Showing posts with label kitchen. Show all posts

Wednesday, November 25, 2015

at long last my love arrived

Two weeks ago was the week!! It was Christmas and my birthday all rolled into one!!  My hood arrived (again, for the second time) and it was everything I had imagined and more. Until it wasn't.


I'm not even going to joke about it being cursed because it most certainly is. The first time it arrived (after 4 months) it was gouged to hell down the middle and had to be sent back. I cannot go back into more detail because that was a dark, dark place in my life. Hood #2 arrived a few weeks ago. Yes, I am about 3 weeks behind in updating you. I hope you can forgive me. My contractor goes to hang it and says it doesn't have power. NOnoNonOnononono. No. no. NO. This cannot be happening.

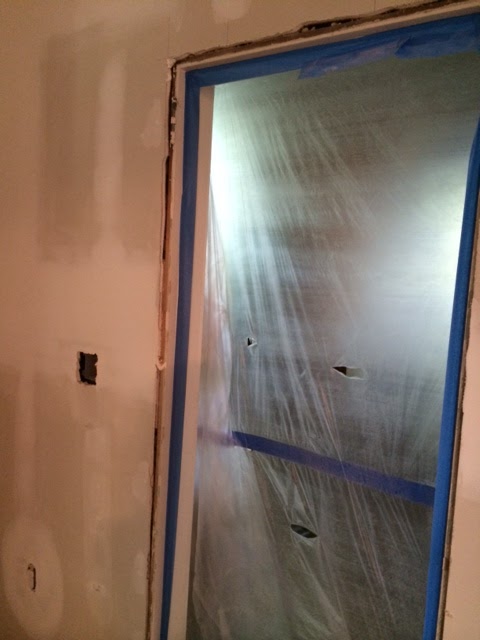
As it turns out, when they had drilled a support ledge in the wall to hold the base of the hood, there were wires that were hanging between sheet rock and an old layer of plaster. One of the 4 inch screws that went through the wall then nicked one of the wires. What are the freaking odds. My contractor didn't realize that is what happened until he reached to grab part of the hood and got a nice, high voltage jolt letting him know the hood was charged and ready to go.

No big deal. He only then had to knock a gigantic hole in a wall in the guest bedroom to deal with that situation. Not a big deal at all. It was only the same day we had decided to have a party at our house. Perfect. Who doesn't love sheet rock dust all over their clothes as a nice little added party favor.

Anyway, it is all water under the bridge now. And I can cook as much curry as I want and it goes right out to flavor my neighborhood.

Quick reminder of what we've been working with since August...I was going for a very industrial chic, aluminum shaft hanging from the ceiling kind of look. 


I honestly had no idea something could take this long to create without it having organs, fingernails and a social security number, but without further ado, here hangs the hood!


Thursday, August 13, 2015

electric feel

Last week was pretty exciting, minus the whole packing up and moving part. There was more real life progress! We all know how much I love lighting, so you know I was pretty damn excited to see those things get some electricity. It has been pretty dark in the house over the past few weeks months in more ways than one. 

Starting with the kitchen, let there be light:


You know nothing can go off without a hitch, so there are a few places where there are more holes than there should be. I am not even going to stress about it as I am currently practicing the Disney Frozen method known as "letting it go".  


And also because, when I popped in from work to check the progress, I found my BRAND NEW counter tops covered with things that are unmentionable. Things similar to those that littered my floor on the first day of demo when it looked like this:


Not cool people, not cool. Was there damage? Yes. Am I ready to talk about it? No. Why am I not in complete hysterics and on another crazy rampage? Again, I am practicing the let it go method. For now. That battle will be crusaded at a later date. 

Moving on...

Between the master bedroom, guest bedroom, and the sunroom, I decided to do a little switch-a-rooskie with the lights. The light from the master bedroom found a new home in the guest bedroom. The light from the guest bedroom (and star of a blast from the past post) found a new home in the sunroom. And the master bedroom got a much needed upgrade from the $10 ikea light that tops out with one 40 watt bulb. It was time. 

So what once looked like this in the master bedroom:


Now looks like this:


After raising the ceiling in the guest bedroom, I was worried the light fixture we had in there previously would be too small. Let's just go ahead and say I was right, because it is too late now. 

So what once looked this in the guest bedroom:


Now looks like this:


(furniture install to come if we ever finish this renovation)

And lastly, the guest bedroom fixture now happily resides here, in the sunroom:


Which will go above my sweet little DIY table project from earlier this month:


Also of note, the hardware for the kitchen was installed as well. I lazily snapped one single picture. It was not a true measure for my level of excitement, I promise. And you obviously know I will take more pictures. Come on, it is the colossal over sharer we are talking about here. 


I think we can officially start counting down the days! And not because we have a definite end date, but because I am going on vacation in September come hell or high water and not even this beast of a project will stop me!! 

Tuesday, July 28, 2015

no beams about it

One of the struggles of this project has been taking down a wall and finding a way to reconcile the new opening with the ceiling heights. In a normal world it wouldn't be that difficult, but I am dealing with a geriatric of a house that was not all built at the same time. The ceiling height in the back hallway is a good two feet below the ceiling in the middle hall because it was an addition added after the original structure was completed. And, the ceiling in the kitchen was probably a foot below that, but we didn't know for sure it was a dropped ceiling until we knocked a hole in the ceiling. I have always LOVED exposed beams, and really wanted to incorporate them in our kitchen. Since the ceilings are now 12' I thought it would also help to add some interest to all that space up thurr. Finding a way for it to work with the different ceiling heights though, has presented its own challenges. 

I knew we would likely need a new structural beam anyway with the removal of the wall, so I wanted to add back as much character as possible. To take out that wall, we had to bid farewell to a transom, which was pretty devastating for Jack. Even though it has absolutely zero functionality, he of course saved it in hopes we can add it above another door that doesn't already have a transom. This is along the lines of what I had envisioned...

via Hooked on Houses

When we took out the wall, we did find out we needed to add a support beam. I was kind of excited thinking of the possibilities. I was hoping for some hipster chic rustic looking beam, but this is what we got instead. Screw practicality.


Please notice the difference in ceiling heights from the third picture. It is like a fun house. Except people live here. And we don't travel around setting up at State Fairs.

Clearly, we can't leave that beam exposed, so I began my search for the perfect ceiling/beam solution. 

Where do I sign up for this next situation? Perfection.

Jessica Helgerson Interior Design

That girl, Jessica Helgerson, can do no wrong. Remember her from here? Jessica, if you're out there, I want to be your BFF. You are everything.

Ceiling beams + La Cornue. Be still my heart.
via Atlanta Homes & Lifestyles

Jill Sharp


This next picture served triple, maybe quadruple duty for me, or whatever comes after that. I used it for inspiration for brass hardware, butcher block counter tops, ceiling beams, open shelving, navy cabinetry for the bar, the list goes on. and on.

Blair Harris Interior Design

L. Kae Interiors


So many unreal options, so little time (and money) at this point. I was really hoping my dad would have some old beams I could use out of a dilapidated farm house on one of his farms, but so far, I don't think I am going to be that lucky.

However, after I had already typed up this post, and in a rare stroke of good luck, my brother in law recently informed me that he might be able to come through for me! He has a weathered and worn beam that he reclaimed from his family's old farmhouse, and he and my sister used some of the wood for a mantle in their new house. He has one beam left over that they weren't planning to use. I think the tides might be turning for me!


Monday, July 13, 2015

hood rat

In a rare show of  semi-laying down the law, Jack made sure to reiterate that he wanted the kitchen to have an exposed hood. I was already leaning that way anyway, so it was a pretty easy decision to move in that direction. The only issue was, the contractor's bid included an allowance for the hood at $ and I seemed to have an eye for hoods that were priced at $$$$$$.  But who doesn't love a good exposed hood?

Jenny Wolf Interiors

This may come as no surprise to anyone, but I think HGTV has ruined my life. I think all of my frustrations and heartbreak regarding kitchen reno sticker shock could have been avoided had I never been exposed to their fallacies. I watch way too many shows where they do an entire gut job, put in granite counter tops, Wolf appliances, always completed in only 3 days, and then say "we just did this whole kitchen for $20K." I hate to be the one to break it to you, but they are liars. LIARS, I tell you, LIARS. I have a vivid memory of a Nicole Curtis episode where she does a full kitchen remodel, puts in carrera marble counter tops, then boasts that the whole job was done for $4K. That, my friends, should be a lawsuit. It gets my heart rate up just thinking about that episode. Am I the only person who got "got" by HGTV?

Throughout this process, whenever I have first gotten a bid back or seen a price, I feel like the whole world is out to get me or someone is playing a sick joke on me. Fortunately, I now realize this is all HGTV's fault, but unfortunately, I am having a hard time accepting reality. I still have the delusion that for one of my big ticket items, the company I ordered it from is going to call me and tell me I am getting it for free because I am their 10,000th customer. It's crazy and ridiculous, you don't have to tell me. But sometimes it's just nice to think about. Kind of like thinking that one day I'll be the opening act for Beyonce, or one day I'll have a frozen yogurt machine instead of a water dispenser in my kitchen. These are just some of the comforting thoughts I like to have in my delusional little head. 

Costs aside, one thing I loved doing for the kitchen project was designing a hood. It was so much fun! My how my definition of fun has gotten drastically lamer the older I get. I went with Vent-A-Hood and they have this sweet feature on their website where you can design your own hood and (instantly!) see a preview and the cost. Confession: I made over 30 hoods. Easily. Once I decided to stop being lazy and finally met with a rep about placing an order, there were actually way more options. More options does not necessarily = a good thing for someone as ADD as me. I have to make a decision at some point. All these options and I am like a 6 year old on espresso. 

I had done years a bit of research ahead of time on hoods, and some of my favorite forms of inspiration are below. 

via Lonny
via Cococozy

via The Suite Life

Next up, Naomi Stein shows us she is a genius once again. She really always gets it right. 
via Lonny

Dianna Agron's entire kitchen...are you kidding me? Can I just be her?
via My Domaine  

Alison Cayne's Kitchen.  A real chef's kitchen for crying out loud, it's not just the hood I want out of this masterpiece. When can I move in and what is the first meal she is going to make for me? Do yourself a favor and check out her entire home tour, linked below, to really make your day. 

Then, of course, I got the half awesome/half terrifying news that the ceilings grew by about 3.5 feet. Guess what that meant? 3.5 extra feet of hood at 3.5 times the price. OK, I am kidding, but it was a little disconcerting at first since I had already designed and gotten my heart set on a particular look. So then I started looking for photos of exposed hoods with higher ceilings to make sure it wouldn't look like it was about to suck up the entire room. 
via Traditional Home

And one last final photo of inspiration. If I am being honest here, I have used every square inch of this kitchen for inspiration. I want everything about this situation to happen in my house. Perfect 10. 

Chassity Evan's kitchen (of Look Linger Love) via So Then They Say

So, I finally placed my order for the hood in May and it is still going to be awhiiiiile before it gets here. Come on Vent-A-Hood, I am dying over here. The suspense is killing me. They really said it could take 15 weeks. 15 weeks. That is 105 days. You are killing me smalls!!!
In the meantime, here is a little sample of what I am waiting on.


Thursday, July 9, 2015

Pimp My Trim

The framers came last week and they got busy tricking out the trim. I couldn't be happier with the progress they made and how great all their work looks...and with pretty much zero input from me. Lucky guys! They don't even know how good they had it. 

Since there were dropped ceilings in the guest bedroom and kitchen, neither room had any crown molding and it virtually drove Jack crazy. First world problems. I was really hoping when we opened up the ceilings there would be a foot of plaster crown molding full of dentil detailing to match the crumbling walls of plaster we had, but no such luck. While I was really concerned with eradicating the house of blue laminate countertops, Jack's legitimate #1 priority for the renovation was adding back crown molding. To each his own. 

If you have been a longtime blog follower and live the most boring life in America, you may remember when I overshared/fully documented the weeks/months we spent repainting all the doors and trim in the hallway. If not, I can provide you with a little throwback Thursday here. I had never noticed we had about 9 different doors and 6 types of baseboards until we painted each and every square inch of the downstairs. It kind of bothered me at the time, but I really have not thought about it again because we finally finished painting and I kept on living my life. 

Fortunately for me, our contractor is as type A as my husband, and he took it upon himself to match all the trim in the hallway as closely as possible without removing all of the original. It was a little terrifying at first, but so far, so good. I think it looks great. 

A few before & after's:


Back bedroom:

 
Hallway:


If you look closely in the next picture to the bottom left, you should be able to see yet more charming qualities of how my house is always keeping it real. Those are two entirely different baseboards on each wall. Now, with a bit of handiwork, they will match throughout the hallway. Also, in the picture to left above, they put in a nice heavy duty threshold since we have a sweet drop off of about 6 inches between the hallway and back sunroom. 


And now, something I am really excited about...they put rods into the studs which will then be epoxy'ed (not a word, I am aware) into the reclaimed shelves. Definitely not finished, but here is a quick preview.  


If you are wondering why the crown molding stops abruptly on the cabinets on the wall with the shelves, have no fear. I ordered a hood that apparently takes longer to create and deliver than a human being, so I am sure they will wrap those cabinets once the hood decides to grace me with its presence. And if you are worried I won't keep you fully updated on the progress with the hood, don't be silly. You know that post is coming all in good time. 

And solely for entertainment purposes...since you've spent the last hour only looking at pictures facing up, how about checking out the floor that is currently my life. Everyday.  Home sweet home. Yes, we are still living here. Yes I have officially lost it. 


I don't think I should be left unattended with something like this.